
Tutorial on Using Depth Sensors for Professional Portrait Shots
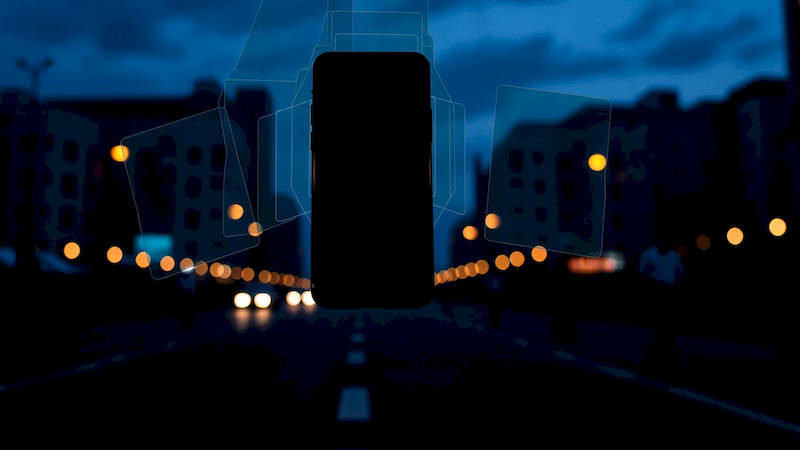
The quest for DSLR-quality portraits using only a smartphone has driven a significant amount of innovation in mobile camera technology. While megapixel counts grab headlines, the often-underappreciated depth sensor is a key component unlocking truly professional-looking portrait photography. For years, achieving that creamy, blurred background – known as bokeh – was the exclusive domain of cameras with large sensors and fast lenses. Now, thanks to sophisticated depth mapping, smartphones can convincingly simulate this effect, allowing anyone to create stunning portraits with a shallow depth of field. This tutorial will delve into the intricacies of depth sensors, explaining how they work, how to effectively utilize them, and how to maximize your smartphone's portrait mode capabilities for results that rival professional cameras.
The rise of computational photography has fundamentally changed how we take pictures. Smartphones no longer simply capture light; they interpret it, using software algorithms to enhance details, reduce noise, and recreate effects previously achievable only through expensive hardware. Depth sensors are critical to this process, providing the necessary data for accurate background separation and believable bokeh simulation. Understanding how these sensors function is the first step towards consistently producing visually compelling smartphone portraits. Furthermore, increasing interest is shown in this technology by consumers, with a recent study by Statista showing a 35% increase in consumers citing portrait mode as a key factor in their smartphone purchase decision.
- Understanding Depth Sensors: How They Work & Different Types
- Optimizing Your Scene for Depth Sensor Performance
- Mastering Your Smartphone’s Portrait Mode Settings
- Compositional Techniques to Enhance Your Portraits
- Post-Processing & Refinements: Taking Your Portraits to the Next Level
- Addressing Common Issues and Troubleshooting
- Beyond Basic Portraits: Creative Applications of Depth Sensors
- Conclusion: The Future of Smartphone Portrait Photography
Understanding Depth Sensors: How They Work & Different Types
At its core, a depth sensor’s job is to measure the distance between the camera and different objects in the scene. This information is then used to create a depth map, which is essentially a 3D representation of the environment. Smartphone manufacturers employ several different technologies to achieve this, each with its own advantages and drawbacks. Time-of-Flight (ToF) sensors are currently the most prevalent. These sensors emit infrared light and measure the time it takes for the light to return, calculating distance based on the speed of light. This provides a fairly accurate depth map, particularly for nearby subjects.
Another approach utilizes dual-camera systems, leveraging stereoscopic vision – similar to how human eyes perceive depth. By comparing the images captured by two cameras, the phone can estimate the distance to various points in the scene. This method tends to be less accurate than ToF sensors, especially at longer ranges, but it’s often more affordable to implement. A third, less common approach involves structured light using a pattern of infrared dots projected onto the scene. The deformation of the pattern reveals depth information. Each method fights issues of varying light conditions, occlusion (objects blocking others), and the reflectivity of surfaces.
The accuracy of the depth map directly impacts the realism of the bokeh effect. Inaccurate depth maps can lead to blurry edges around the subject or unnatural blurring of background elements. Newer generations of depth sensors are increasingly sophisticated, offering greater accuracy and faster performance. This graphical precision is vital – a study by DxOMark found that phones with more accurate depth maps had a 20% higher score in portrait mode tests.
Optimizing Your Scene for Depth Sensor Performance
Even the most advanced depth sensor can struggle in certain conditions. Understanding these limitations and taking steps to mitigate them is crucial for achieving optimal results. Good lighting is paramount. Depth sensors, particularly ToF sensors, rely on infrared light, and their performance can be degraded in extremely low-light or brightly backlit situations. Ensure the subject is well-lit and avoid harsh shadows that can confuse the sensor.
Background complexity also plays a significant role. A cluttered background with many overlapping objects can make it difficult for the depth sensor to accurately separate the subject from its surroundings. Simplification is key – try to position your subject against a relatively clean and uncluttered backdrop. Moreover, factors like reflective surfaces or sheer materials can pose challenges. Glass, mirrors, and translucent fabrics can scatter infrared light, leading to inaccurate depth measurements. When shooting subjects wearing such materials, consider adjusting your shooting angle or using a different composition to minimize these issues.
Mastering Your Smartphone’s Portrait Mode Settings
Most smartphones offer a range of settings within their portrait mode. Becoming familiar with these settings is essential for fine-tuning your results and achieving the desired aesthetic. The most common setting is the "aperture" or "f-stop" control, which determines the amount of background blur. Lower f-stop numbers (e.g., f/1.4, f/2.0) create a shallower depth of field with more pronounced blur, while higher f-stop numbers (e.g., f/5.6, f/8.0) result in less blur and more of the scene in focus.
Beyond aperture control, some phones offer "stage lighting" effects, allowing you to simulate studio lighting setups. These effects can enhance the subject's features and add a dramatic touch to your portraits. Furthermore, explore the option to adjust the intensity of the portrait effect after the shot is taken. Many phones allow you to refine the blur level and even edit the depth map to correct any inaccuracies. Finally, remember that most smartphones utilize software-based post-processing. To ensure the depth sensor has enough information, maintain a stable hand or utilize a tripod, especially in lower light.
Compositional Techniques to Enhance Your Portraits
While the depth sensor does the heavy lifting in terms of background blur, strong compositional techniques are still essential for creating captivating portraits. The "rule of thirds" is a classic guideline, suggesting you place key elements of the scene (such as the subject's eyes) along imaginary lines that divide the frame into thirds both horizontally and vertically. This creates a more balanced and visually appealing composition.
Leading lines, such as roads, fences, or architectural elements, can draw the viewer's eye towards the subject, adding depth and interest to the image. Framing the subject using natural elements, such as trees or arches, can also create a sense of intimacy and draw attention to their face. Pay close attention to the background – avoid distracting elements that might detract from the subject. A clean and uncluttered background will allow the subject to stand out and the bokeh effect to be more pronounced. As legendary photographer Annie Leibovitz once said, “A thing that you see in my pictures is that I was not afraid to fall in love with my subjects.” Emotionally connecting with your subject translates into impactful composition.
Post-Processing & Refinements: Taking Your Portraits to the Next Level
Even with a well-exposed and accurately depth-mapped portrait, post-processing can elevate the image further. Smartphone photo editing apps, such as Adobe Lightroom Mobile or Snapseed, offer a range of tools for enhancing portraits. Adjusting the exposure, contrast, and highlights can bring out details and improve the overall dynamic range.
Subtle color grading can also add a specific mood or aesthetic to the portrait. However, avoid overdoing it – natural-looking portraits are often the most effective. Many apps also offer specific portrait-enhancing tools, such as skin smoothing and eye brightening. But use these features sparingly to avoid creating an unnatural or artificial look. It’s also beneficial to utilize the editing tools that allow adjustments to the bokeh itself – selectively blurring or sharpening specific areas can sometimes refine the overall effect.
Addressing Common Issues and Troubleshooting
Despite advancements in depth sensor technology, certain issues can still arise. One common problem is inaccurate edge detection, where the software struggles to separate the subject from the background, resulting in blurry edges around the hair or glasses. This can often be corrected in post-processing by manually adjusting the depth map or using a selective editing tool. Another issue is unnatural bokeh, where the blur appears artificial or inconsistent. This can be caused by inaccurate depth mapping or overly aggressive post-processing. Experiment with different settings and post-processing techniques to find the optimal balance.
Finally, remember that depth sensors perform best at certain distances. Most sensors have a limited range, and accuracy can decrease significantly when shooting subjects that are too close or too far away. Experiment with different shooting distances to find the sweet spot for your smartphone. If your smartphone has a "Pro" or "Manual" mode, experiment with slightly higher ISO settings to ensure the sensor receives enough light if you're struggling with low-light performance.
Beyond Basic Portraits: Creative Applications of Depth Sensors
Depth sensors aren’t limited to standard headshots. They open up a realm of creative possibilities, allowing you to experiment with different portrait styles and techniques. Consider using the depth effect to create miniature scenes, making everyday objects appear small and charming. This can be achieved by positioning the camera close to the subject and maximizing the background blur. Another interesting application is creating selective focus effects, where only a specific part of the portrait is in sharp focus, while the rest of the image is blurred.
You can also use depth sensors to create double exposure effects, blending two images together seamlessly. Some apps offer specific tools for this purpose, allowing you to control the blending modes and create unique artistic effects. Finally, explore the possibilities of using depth sensors for 3D photography, capturing images that can be viewed in virtual reality or augmented reality.
Conclusion: The Future of Smartphone Portrait Photography
Depth sensors have revolutionized smartphone portrait photography, empowering users to create professional-looking images with ease. By understanding how these sensors work, mastering the available settings, and applying strong compositional techniques, you can consistently achieve stunning results. While the technology isn't perfect, ongoing advancements are continuously improving accuracy and performance. As computational photography continues to evolve, we can expect even more sophisticated depth sensing capabilities in future smartphones, bridging the gap between mobile and professional photography.
The key takeaways from this tutorial are that optimizing your scene for depth mapping, understanding your phone’s unique portrait mode settings, and utilizing post-processing tools are all vital to success. Don’t be afraid to experiment and push the boundaries of what’s possible with your smartphone camera. The most powerful tool you have is your creativity, and with the help of depth sensors, you can unlock a world of photographic possibilities. Remember to practice consistently and analyze your results to refine your technique and unlock your full potential as a mobile portrait photographer.
Deja una respuesta